OEM Parking Brake Shoe Set 4 pieces Land Cruiser 80 w/big rear disc brakes (08/1992-on)
46540-60050
46550-60060 x2
46580-60050
Toyota - Japan
 - Land Cruiser w/rear disc brakes - Prado LJ78, KZJ78, HZJ77, 80 Series/Lexus LX450 (HDJ, FZJ) - RC-RDB-Combi-Kit 04941-LC80")
 - Land Cruiser w/rear disc brakes - Prado LJ78, KZJ78, HZJ77, 80 Series/Lexus LX450 (HDJ, FZJ) - RC-RDB-Combi-Kit 04941-LC80")
 - Land Cruiser w/rear disc brakes - Prado LJ78, KZJ78, HZJ77, 80 Series/Lexus LX450 (HDJ, FZJ) - RC-RDB-Combi-Kit 04941-LC80")
| Article number: | RC-RDB-Combi-Kit 04941-LC80 |
| Availability: | In stock (3) |
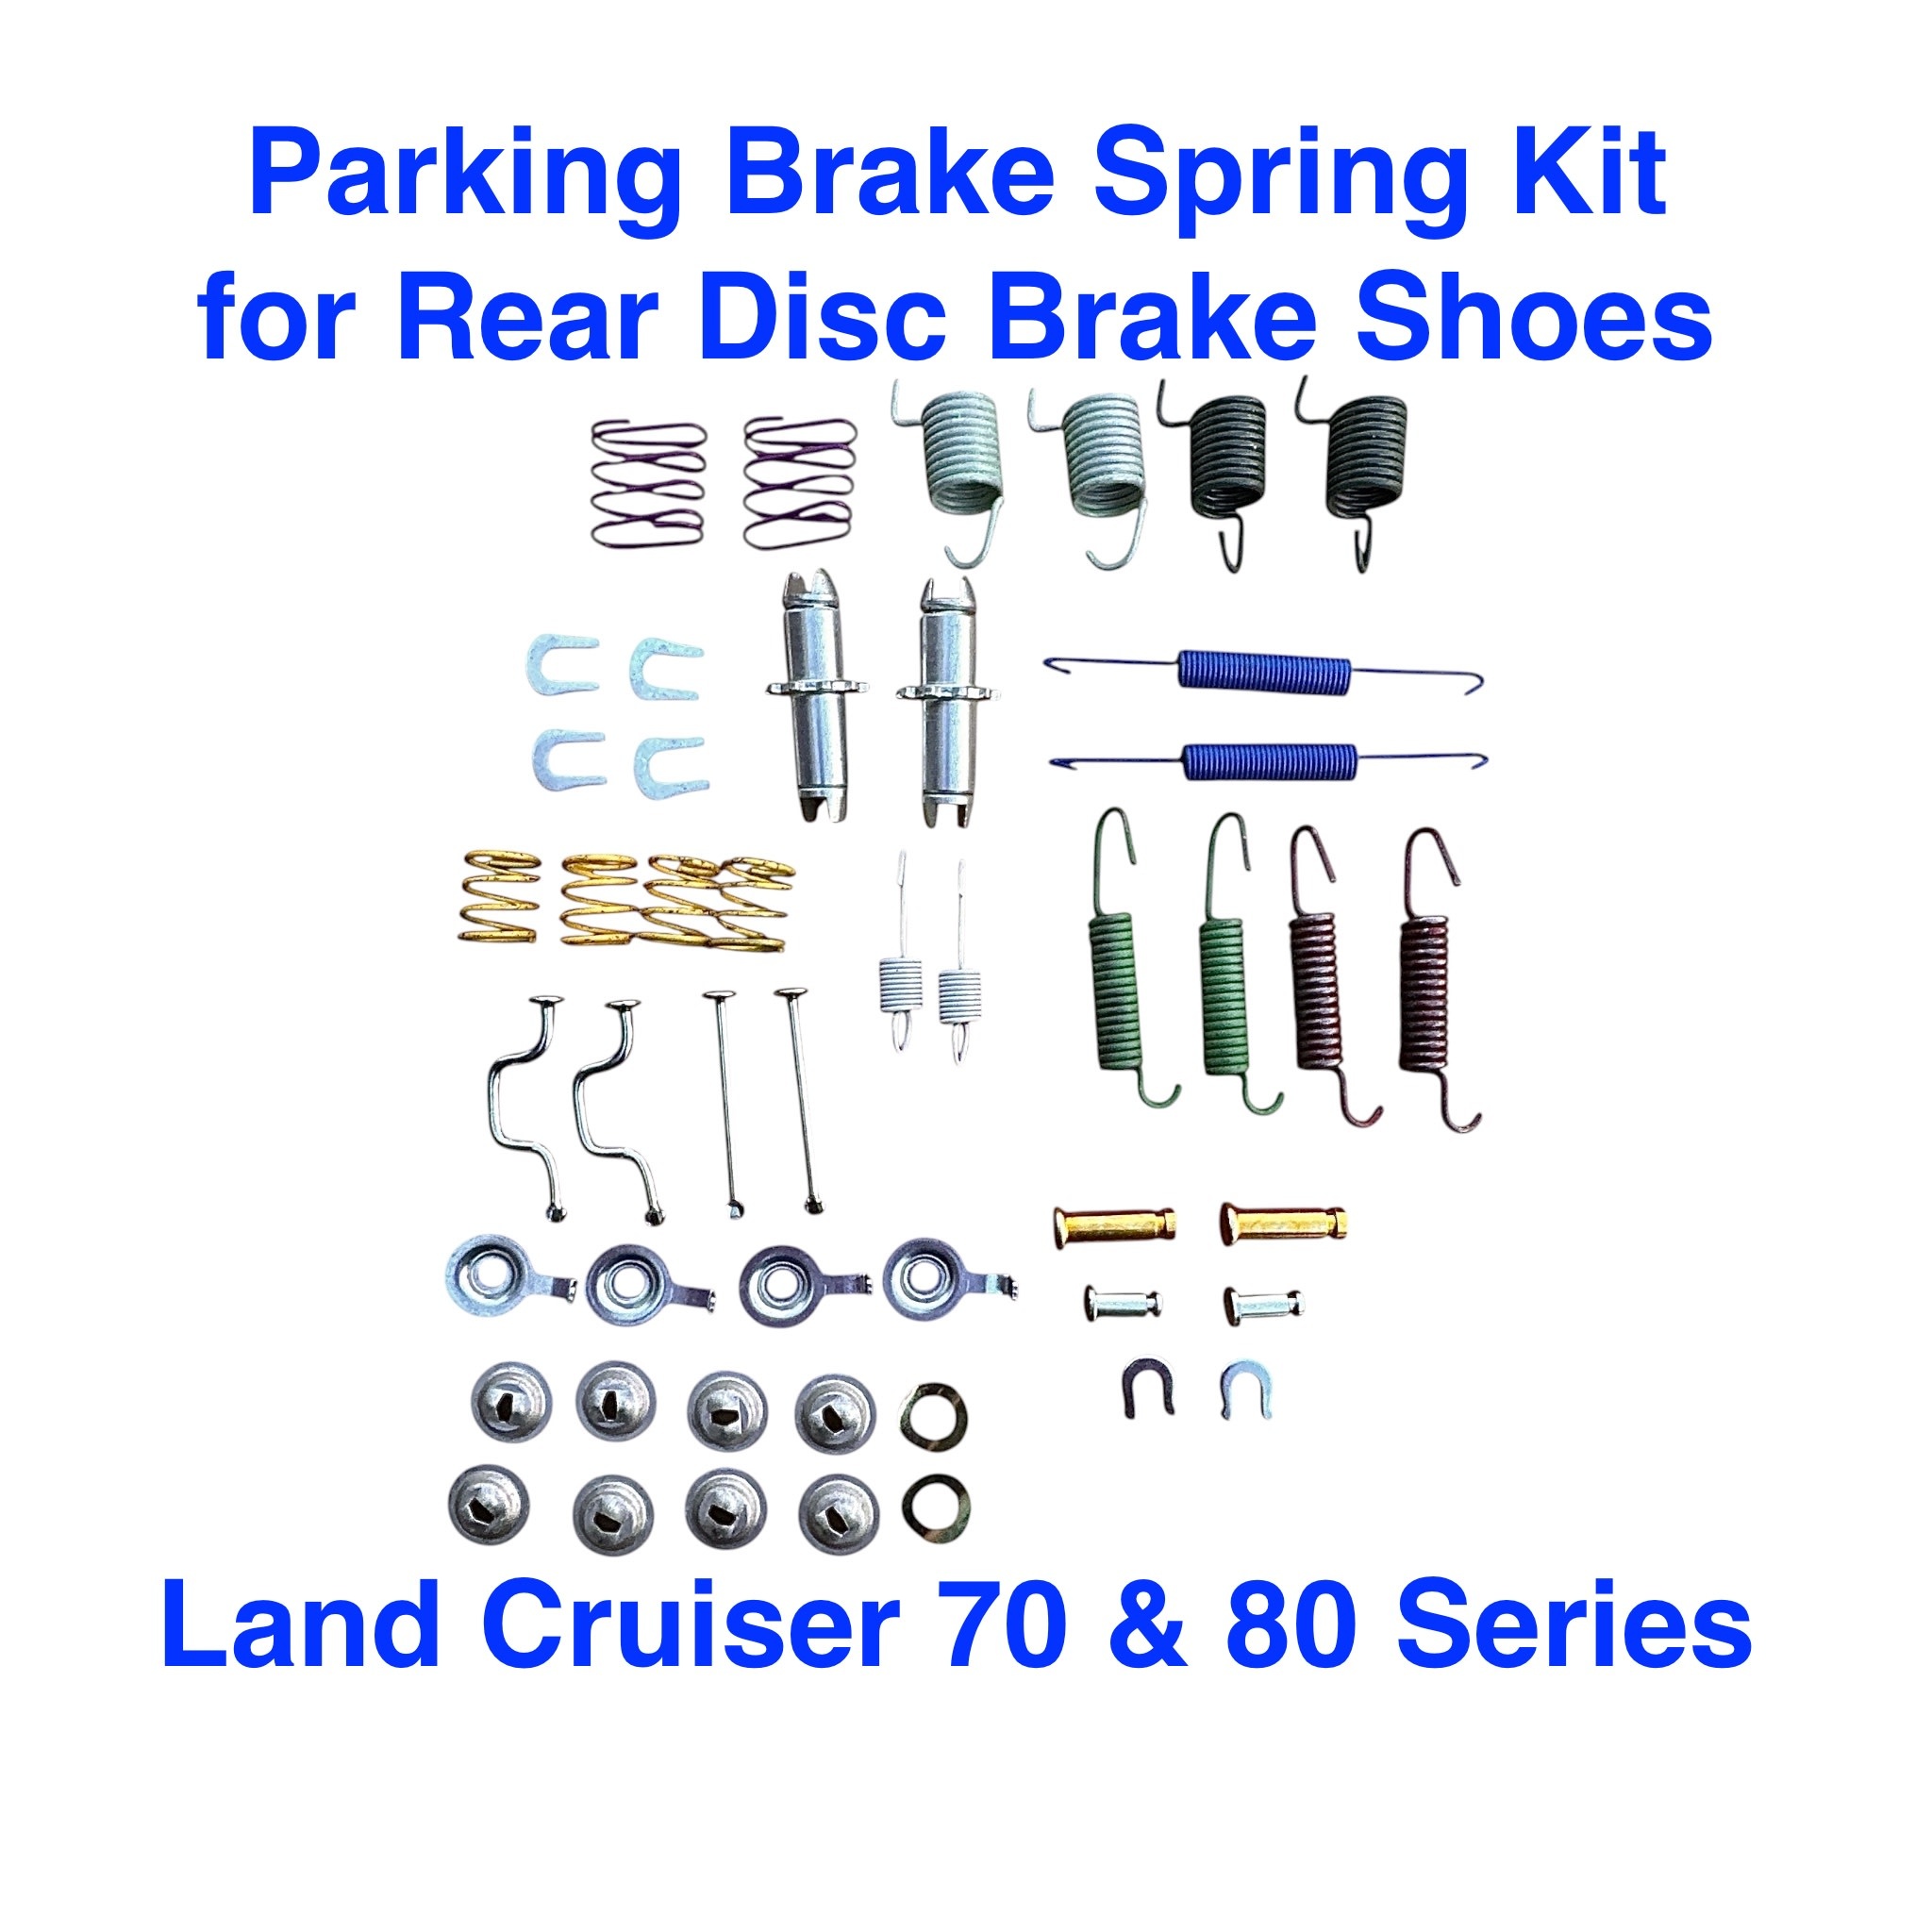
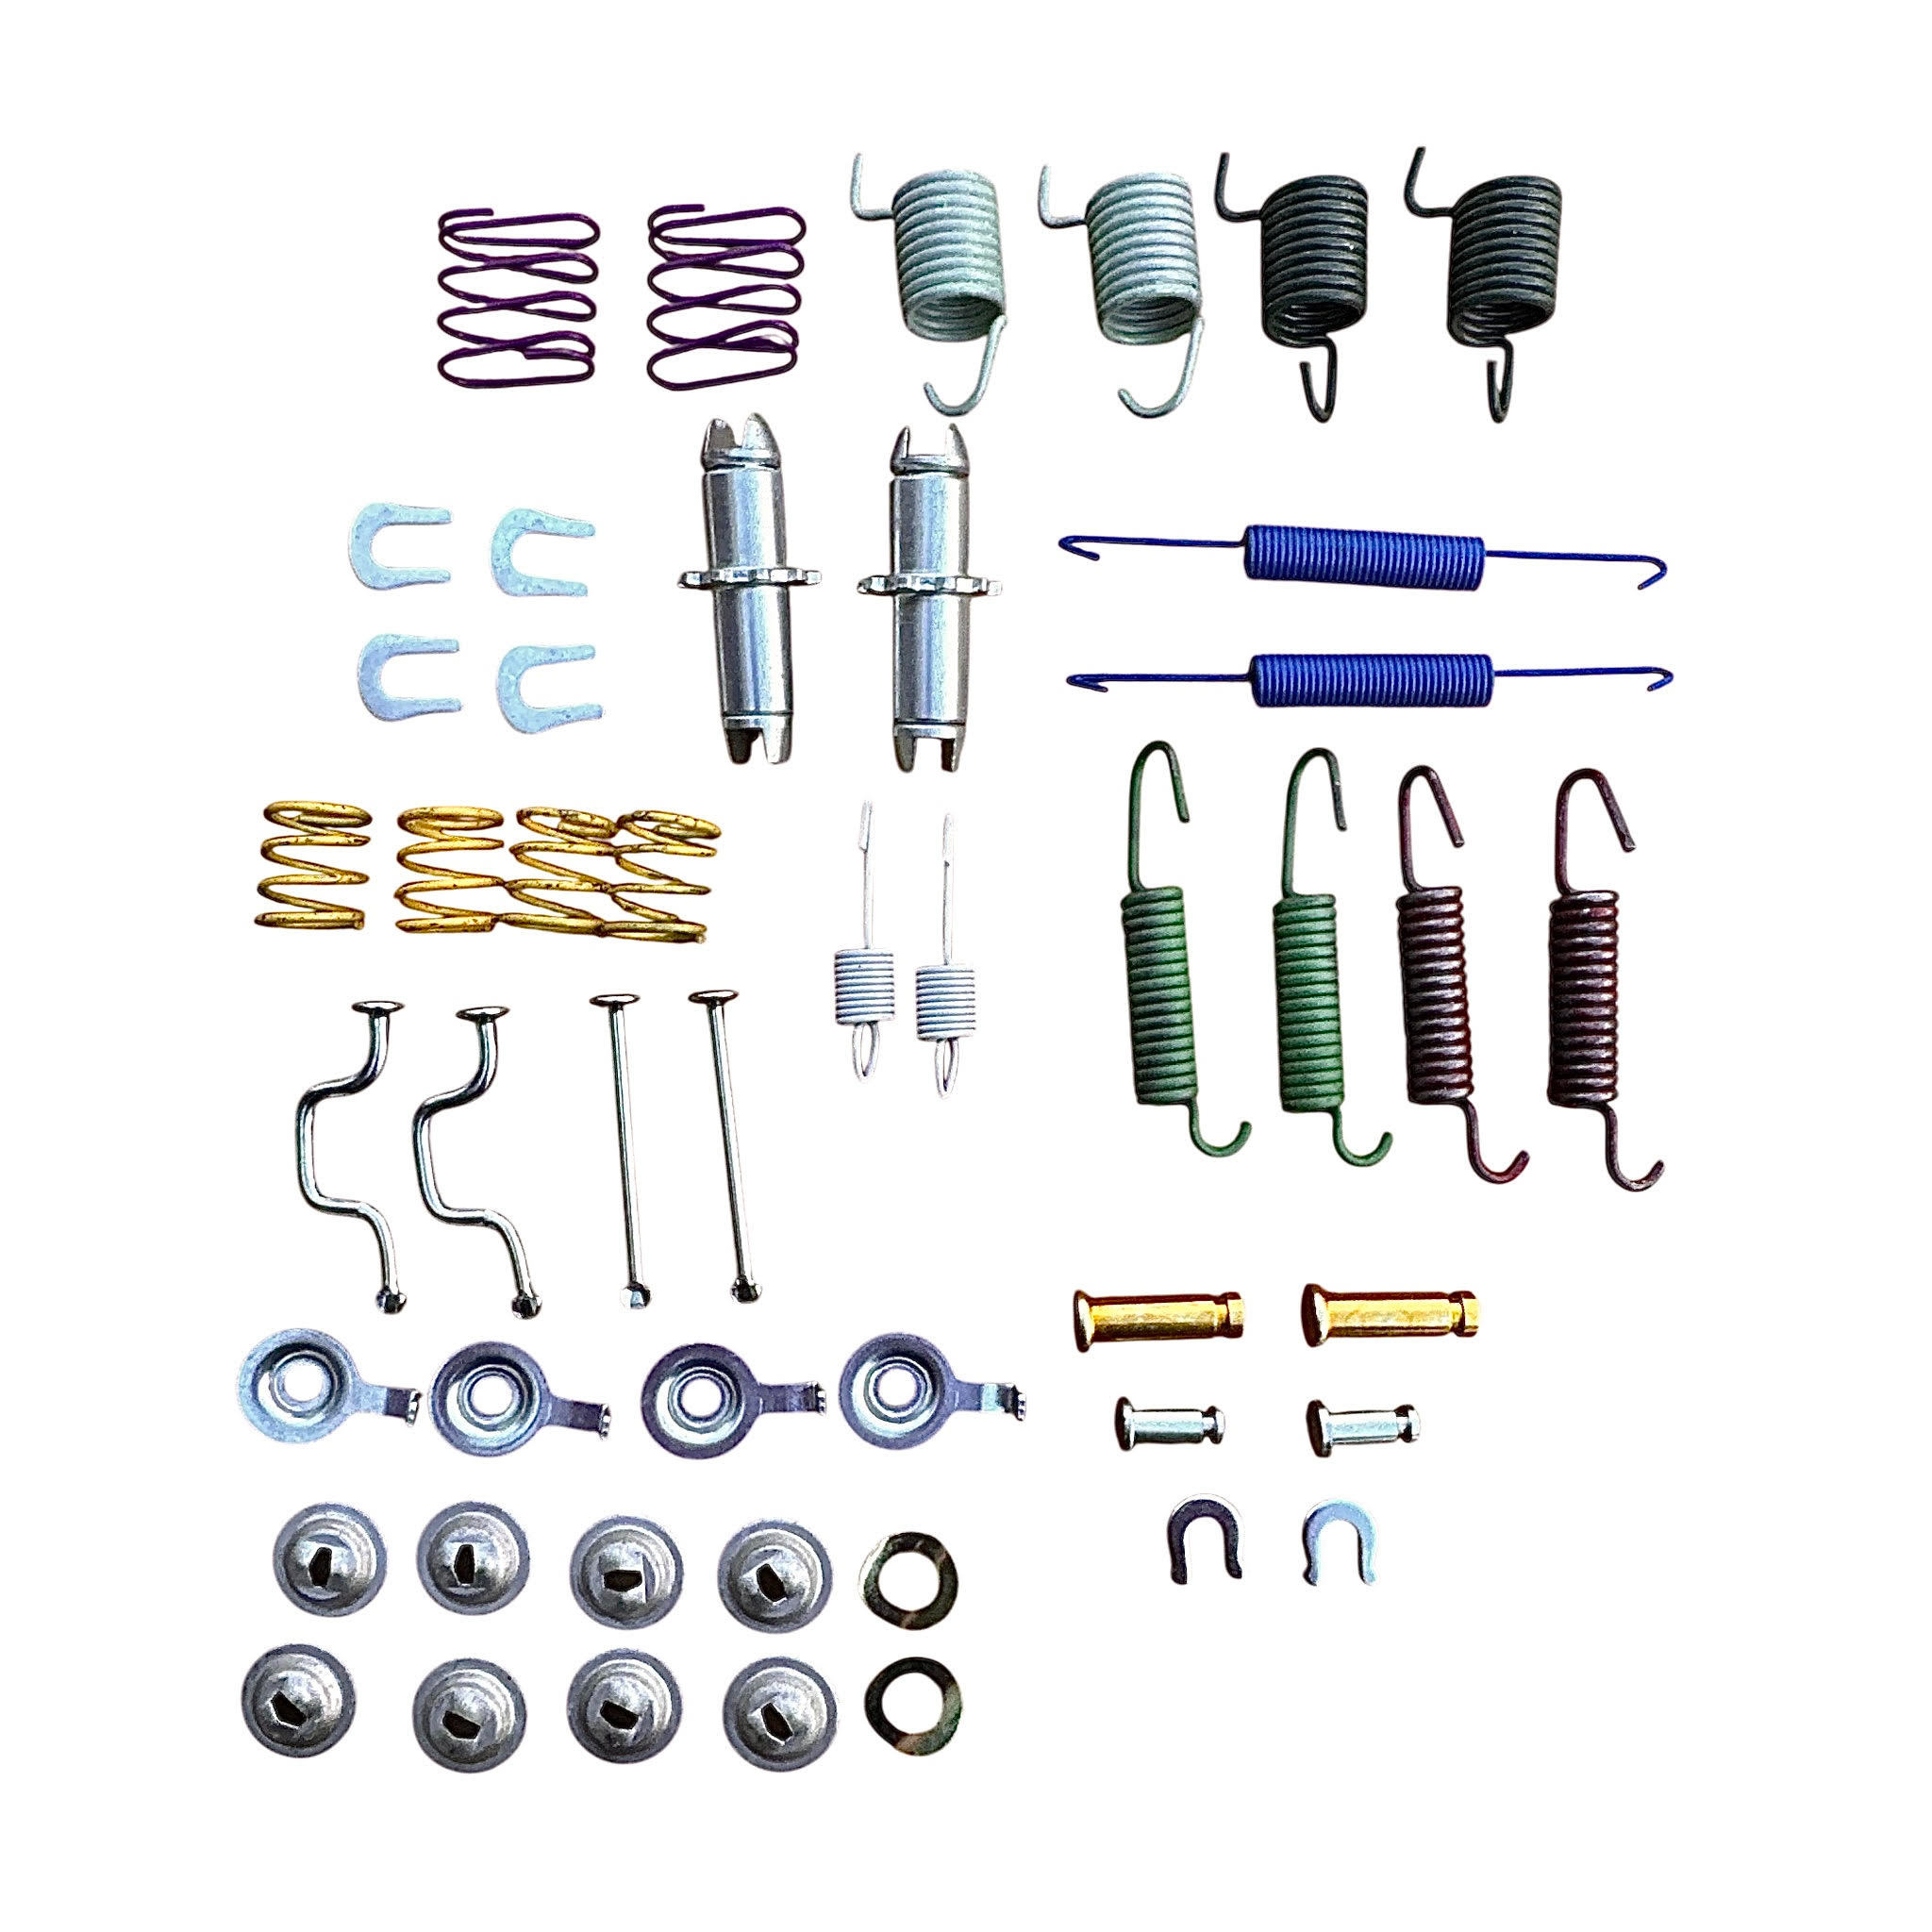
Parking Brake Hardware Kit for Rear Disc Brake Land Cruiser 70 & 80 Series
This kit is a mixture of OEM and aftermarket parts to keep costs reasonable.
Notes:
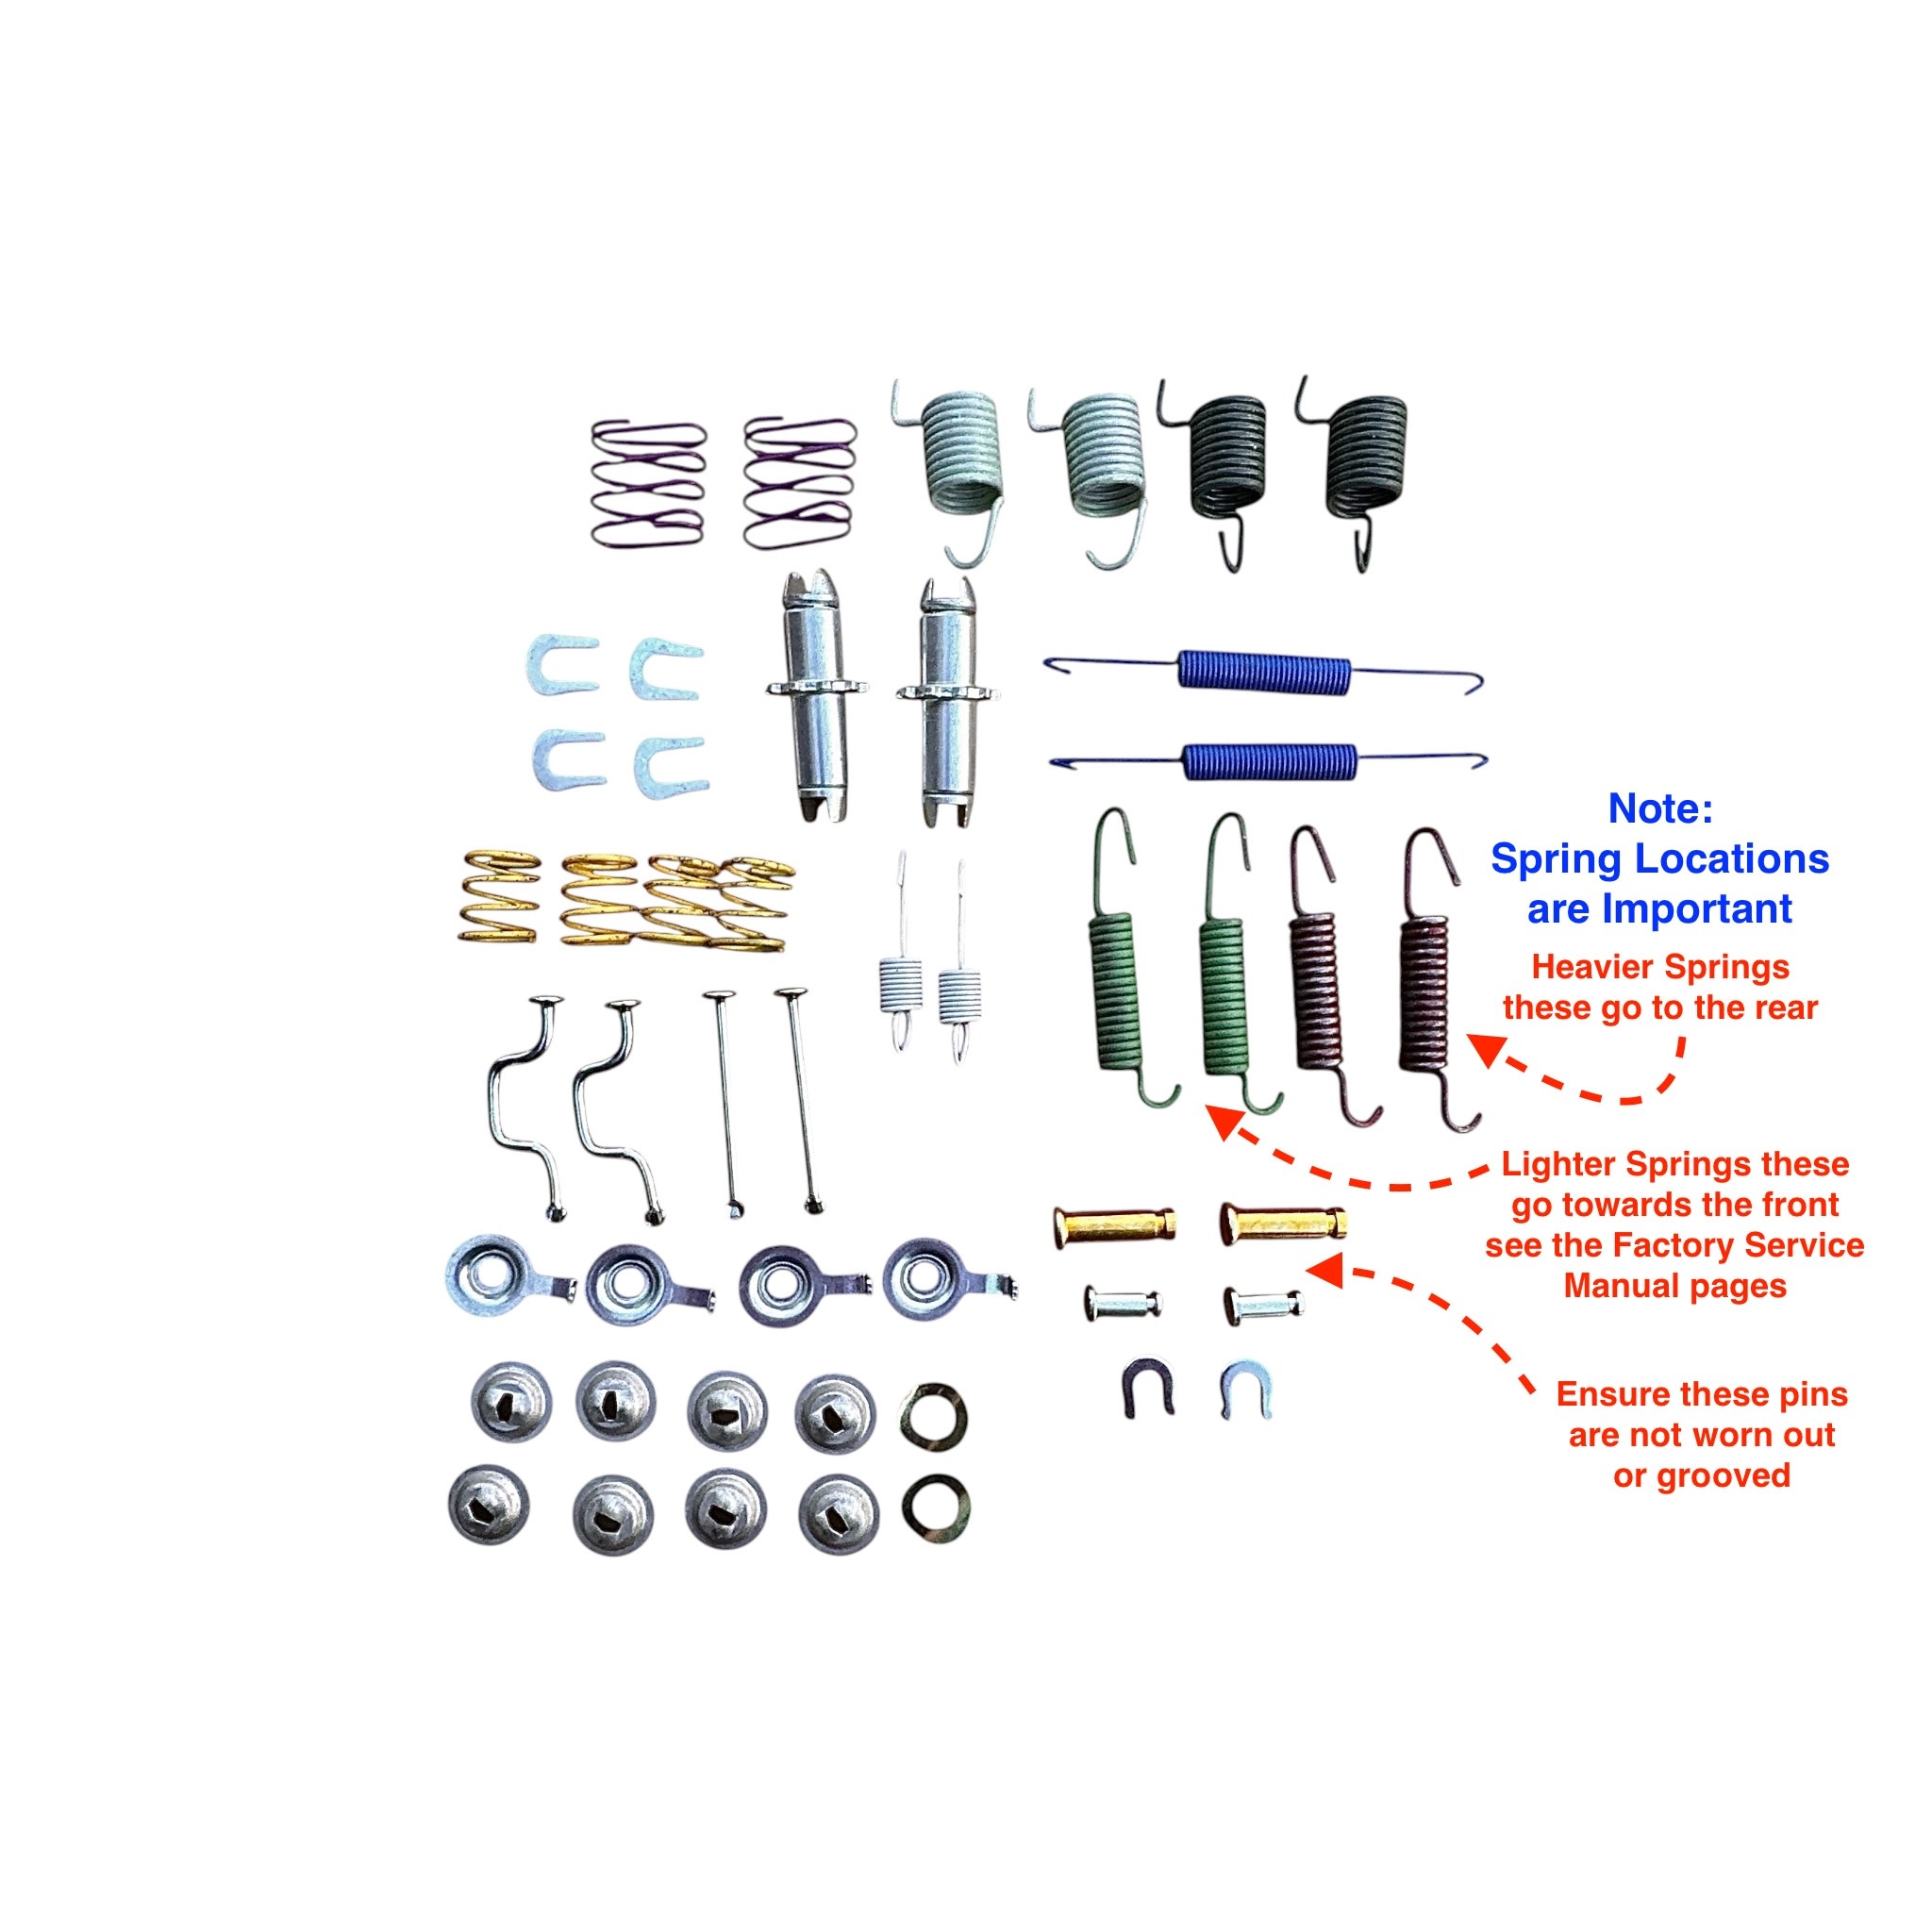
• The brake shoe return springs have two different sizes.
• Their correct location is important, and the stiffer springs with fewer coils go towards the rear shoe.
• See the diagram in the images on this page, and download the .pdf document
• Download this --> Parking Brake Hardware & Spring Location Diagram from the Toyota FSM
Installation tips that are in addition to what's in the Factory Service Manual
If you want to have a successful parking brake project, then you really need to pay attention to small details and be able to read, understand, and follow a detailed list of procedures.
The Factory Service Manual outlines the procedure, but even experienced techs think they know better and screw this job up with shocking regularity.
If you're too impatient or if you are unable to put the service manual instructions into hands-on action, then you're not going to have success - get someone else to help you with this job.
• The rear axle must be sitting at ride height - on axle stands - when doing this job. The vehicle's rear axle absolutely must not be hanging at full extension/drop on a vehicle lift.
• If your vehicle has even a moderate amount of lift, then you will need to re-route the parking brake cable to have it not cause binding of the parking brake shoes when your vehicle is off-road and the suspension is drooping or articulated. This may require you to fabricate new mounts, create movement in cable guide points or routing, and otherwise get a bit creative with reducing or eliminating parking brake cable binds and kinks.
• Your rear wheel bearings must be correctly adjusted with no felt play when the tires are in place and the wheels are off the ground. This is done using the traditional method of grabbing the tire at 12 & 6 o'clock and then pushing back and forth to detect play.
It is much more challenging to detect loose rear wheel bearings due to the attached axle shaft (if the axles shafts are in place) as they are difficult to move inside the diff. If you remove the shafts, you will get a much better feel of how loose the bearings are.
• Having the bellcranks resting against the backing plates is your starting point: This can be achieved a few different ways, but the main rear parking brake cable must be slacked off inside the vehicle - all the way - to be able to have the rear parking brake bellcranks resting against the backing plates. OR, you can remove the pins holding the cable ends to the bellcranks, do the work at the drums, then slack off/adjust the cable inside the vehicle at the end of the procedures to have the bellcranks resting on the backing plates.
• Worn out pins inside the parking brake disc/drum, at the bellcrank pivot point, or at the bellcrank to parking brake attachment points can and will create excessive play that will be challenging to adjust out.
• The aluminum brackets that the parking brake bellcranks pivot inside of are prone to electrolytic corrosion due to the use of dissimilar metals, and this can bind the bellcranks. It is not uncommon to have to replace these parts - the brackets, the pins and clips, the bellcranks and the protective boots. There are left and right handed parts - make sure you order the correct items ahead of attempting this job.
• When working on the parking brake bellcrank brackets and bellcranks, it's a really good idea to carefully use a silver (zinc-based) anti-seize compound or non-melting silicone or ceramic brake parts lubricant on the pins, brackets, and bellcranks to reduce corrosion and seizing of these parts.
• One of the last steps that often gets missed is the breaking-in or bedding-in procedure for the rear shoes. This is outlined in the Toyota Factory Service Manual, but more often than not it's not performed. However, not bedding-in the brake shoes and then re-adjusing the drum to shoe clearance along with a final parking brake cable adjustment inside the vehicle must not be overlooked.
• Lastly, the bedding-in process will make the drums and shoes very hot. When parking the vehicle, allow the brakes to cool down with the parking brake shoes not being held against the disc/drum - be safe, don't let your vehicle roll away on you. Once the brake drums and shoes have properly cooled, the parking brake should have very good hold. If not, then re-check and re-adjust the shoe to drum clearance and/or the brake cable adjustment.
RC-RDB-Combi-Kit 04941-LC80

 - 46550-60030-1")
 - Land Cruiser 70 & 80 Series - 47616-60020")


