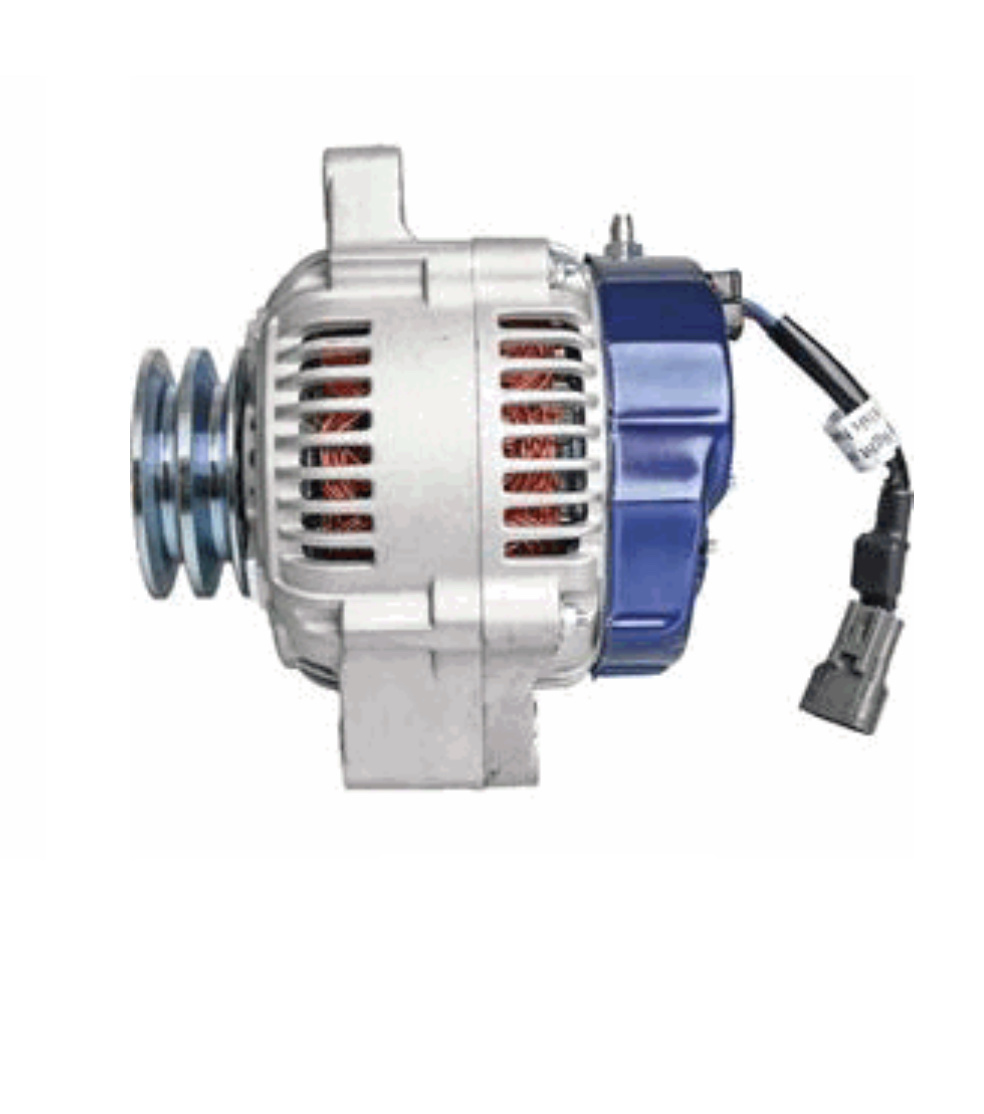
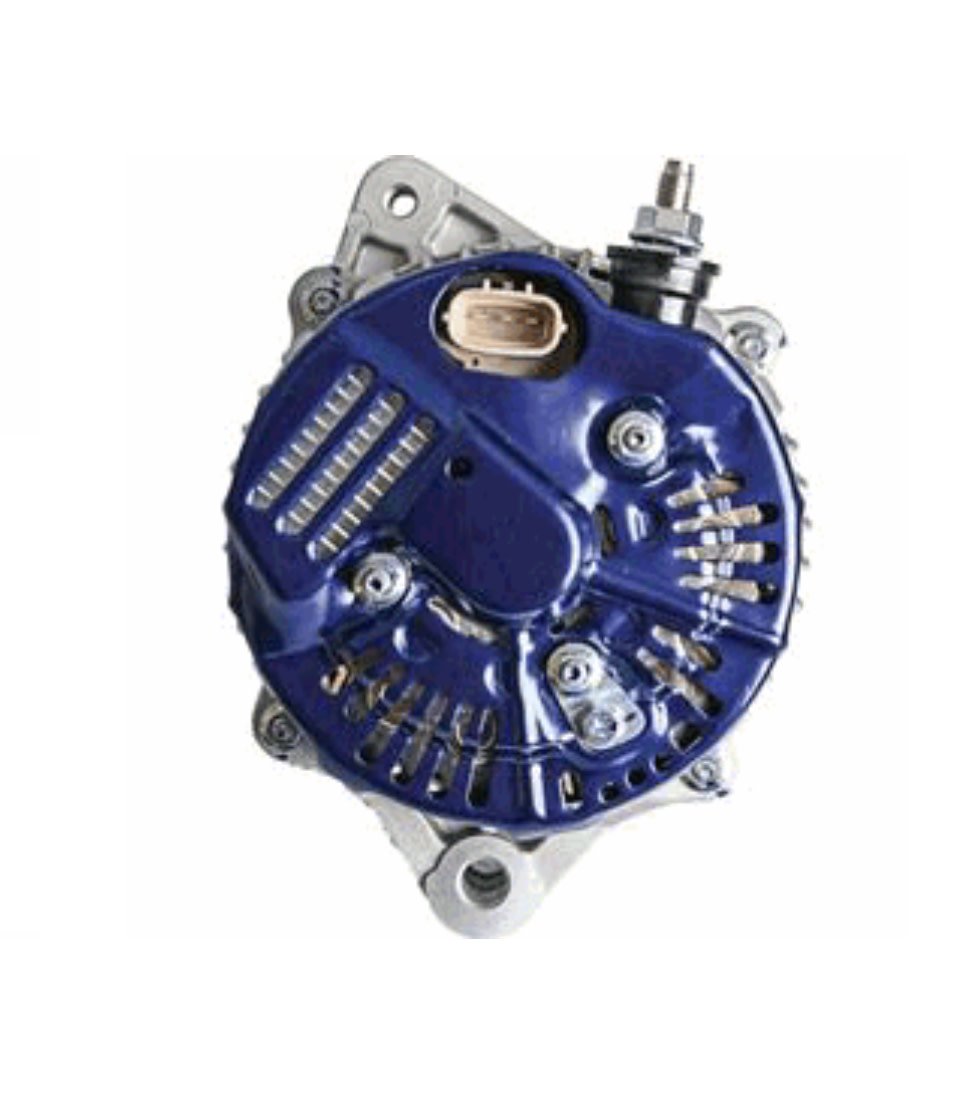
Alternator 12V 160A High Output w/harness 1PZ, 1HZ, 1HDT & related models
DXA433MHO
Replaces:
27060-17020
27060-17040
27060-17180
27060-17181
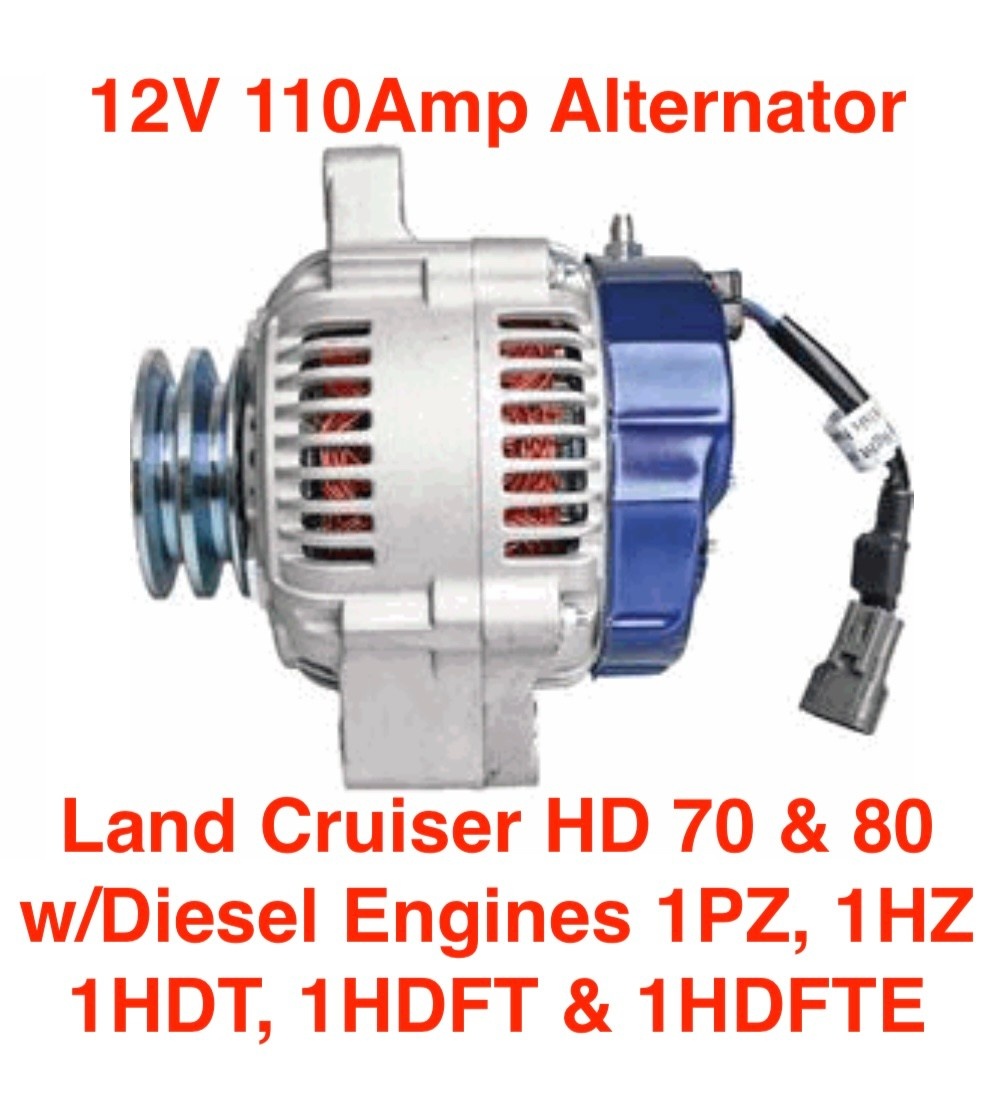


| Article number: | DXA433M 110A High Output Alternator |
| Availability: | In stock (5) |
Alternators are shipped with added shipping insurance included in the price of the item.
These are brand new aftermarket units. No core required.
You will require a new "adjusting bar" (aka tensioning bracket) if you have an earlier model 1HDT/HDJ81 (prior to 1993 model year - ask if you are in doubt).
Common signs of alternator failure in HDJ80/HDJ81 are:
• Instrument cluster lights coming on when the engine is running - this appears as a "check bulb sequence" that happens when you turn on the key but before you start the engine but happens while the engine is running. This is usually caused by the voltage regulator failing and is usually a "once and done" kind of failure - meaning you won't get any more output voltage.
• Low voltage at the voltmeter after the engine has been running for several minutes (and after glow plug post-glow feature has turned off - which can take up to a few minutes). This can be caused by diode failures or the brushes wearing out.
• Alternators typically first fail/wear out in the 180,000km - to 220,000km mileage window depending on how and where they were used. If you alternator has been in service for longer than this amount of time/mileage, then you should either physically remove it and have it inspected, have it rebuilt, or replace it with a higher output unit such as the one listed here before it fails in the middle of nowhere.
**Please read the notes below for more information**
Note 1: The wiring from the alternator to the batteries should be upgraded to take advantage of the higher capacity. Ideally 4ga fine stranded copper wire should be used for runs or less than 5 feet, or 2ga for runs exceeding 5 feet.
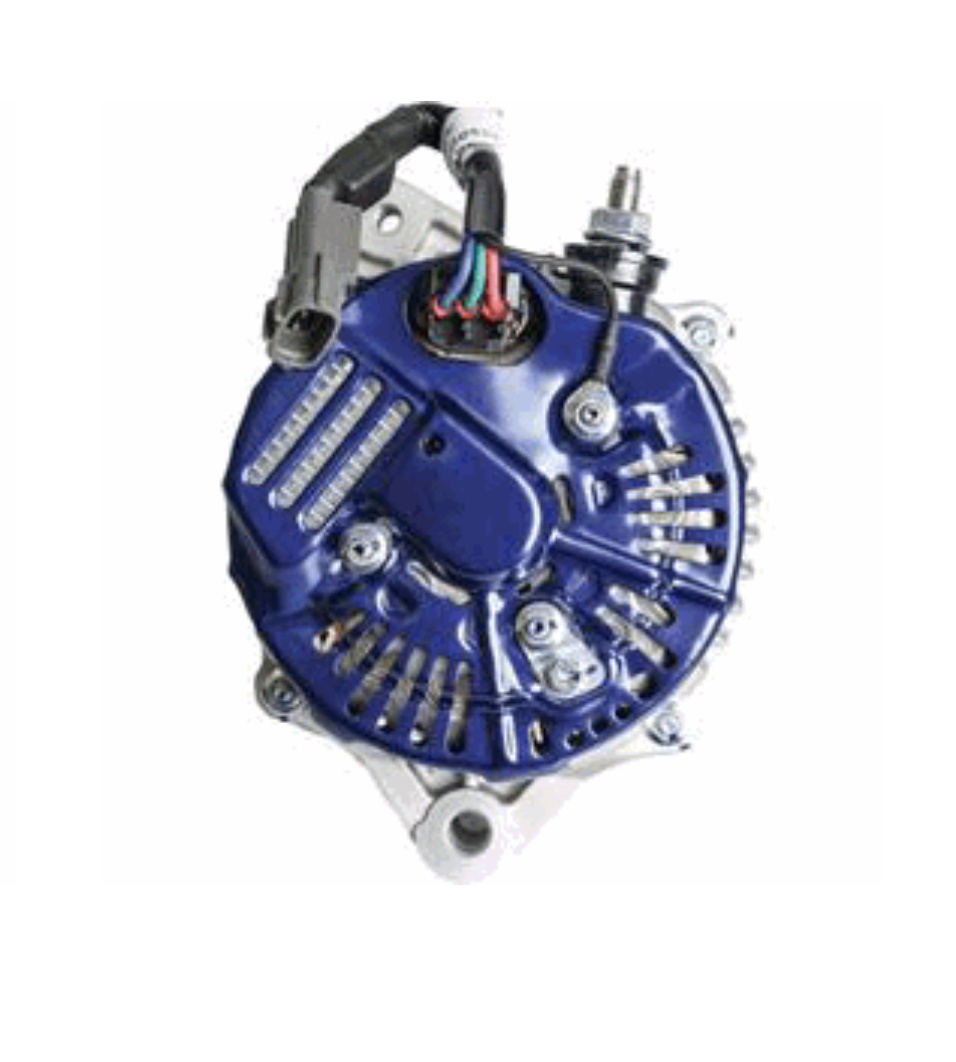
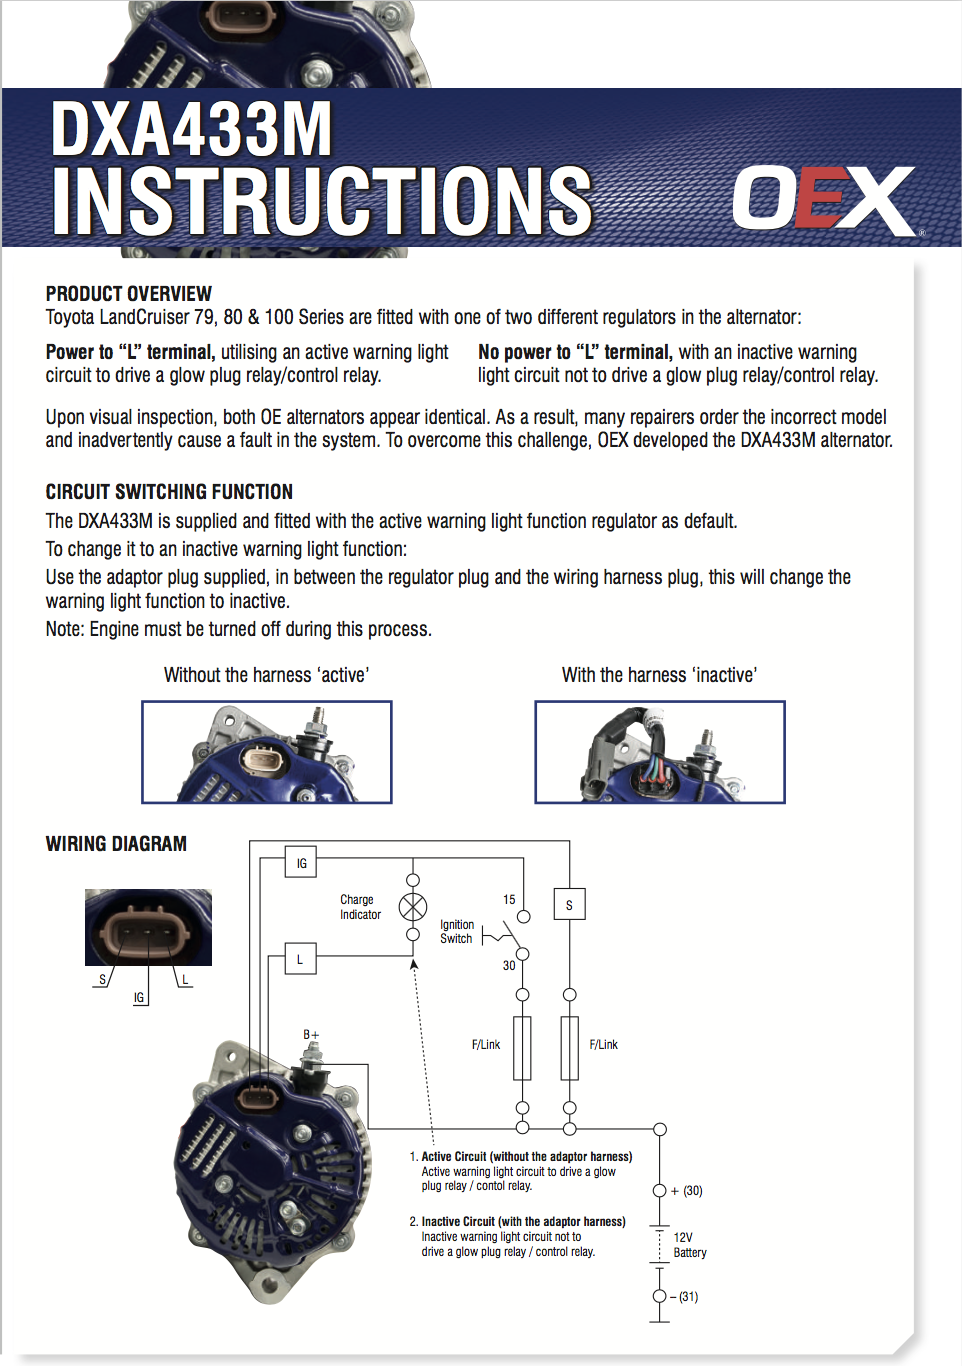
Note 2: The DXA433M uses an updated regulator that can used with 79, 80, and 100 Series Land Cruisers having either an active or inactive warning light circuit to drive a glow plug timer/relay. Using the provided harness will convert it to the inactive warning light type.
NB: For use in Japanese HDJ81s, use it in the 'active' position for activation the glow circuit and charge lamp.
Notes 3: Ensure your batteries are fully charged and in good condition OR replaced with new units before hooking up this new alternator.
• Make sure your battery terminals and connections are in excellent condition. Ensure your frame and engine block ground points are clean and tight.
• Most JDMs arrive with ancient, low performing batteries still in place - the vast majority of these are junk. We recommend you install two new high quality group 27 (or larger) batteries in their place.
Weak or dead batteries is the No. 1 killer of alternators!
If you kill your new alternator by connecting it incorrectly, or to weak or dead batteries, there will be no warranty (yes, we can tell if you have done this upon inspection!)
Note 4:
A customer question:
"Hi, I purchased the DXA433M alternator for my HDJ80. It is not generating power. Is this a grounding issue? I do not have the 3 wire harness hooked up, just the power cable to the battery. I have checked and re-checked the fuse. Anything else you could suggest to check?"
Reply:
• Alternators MUST be run with the alternator harness and power output (B+) lead properly connected to clean and tight connections. The harness connector and the B+ leads must NOT be connected or disconnected while the engine is running and the system powered up (this is the case with ALL alternators with internal regulation) or the voltage regulator and/or diodes may suffer from instantaneous catastrophic failure.
• The voltage regulator is controlled by the three wire harness connection, and without the voltage regulator connected the alternator will not produce power at all.
~~~//~~~//~~~//~~~
Installation Instructions - provided by a helpful client:
Allow about 2 - 2.5 hours for installation. Plan your beer & pizza consumption accordingly.
NB: Disconnect your battery ground cables on both batteries before starting any work on your electrical system.
1. Remove the AC compressor from the bracket (and lay it aside) and the air filter cover to make the most room.
2. Remove fan before before loosening belts to make working room; it does not need to be taken out, just let it rest forward of the pulley.
3a. Loosen Tension bracket bolts fully (they don't come out due to fan), Remove the hinge bolt, unplug and disconnect your alternator wiring, remove the old alternator.
3b. If you have an earlier model, the new alternator is larger in diameter and requires a new bracket. You will need to remove the bolts holding the tension bracket to the block and install the new bracket.
4. At the alternator lower mount (where the hinge bolt inserts), tap the hinge bolt bushing forward slightly, about 2mm, to increase the gap available for new alternator lower mounting leg to insert into place. [The bushing is the small tube, with a flat surface one side, that is pressed in to the front hinge bolt hole of the lower mount.]
5. Insert the alternator into place on the lower mount - with space in the gap, it should go in easily. If it needs to be tapped in to place, gently use a dead blow hammer or a block of wood between the alternator and a ball-peen hammer.
6. Insert main hinge bolt in bottom.
7. Put belts in to place
8. Flip the tension block other way around than it was previously (you can tell by the circular scratches on the one side).
9. Insert the small adjuster screw through the tension block and into the alternator (do not tighten, just get it threaded).
10. Pull the alternator back to make belts hand-tight.
11. Insert the large adjuster screw and thread it into the adjuster tension block.
12. Tighten the 2 adjuster bracket bolts (they should now fit).
13. Tighten up the long adjuster bolt to appropriate tension, tighten down the smaller bolt through the tension block.
14. Put everything else back in place following the reverse procedures. Torque all fastener to specification.
Replaces Toyota part numbers with the included round/oval adapter plug assembly:
OEX Brand - Designed in Australia, Made in Taiwan
8511.50
updated: 2021 02 10, photo updated 2026 Jun 08
2706017020
2706017040
2706017180
2706017181
Backorders may be placed if no stock is showing. Backorders will be filled as soon as possible (usually about 21 days).


 Pajero V26/V46 (M395) - (90916-02452) 90916-02330")
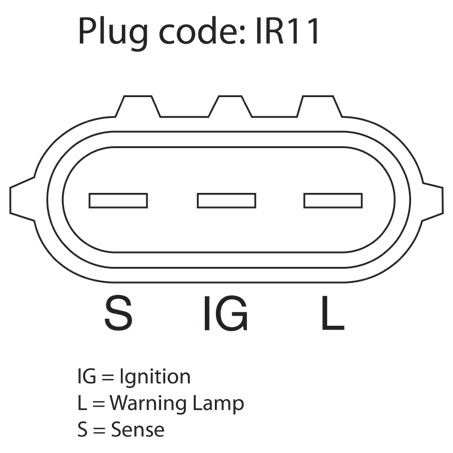
 sockets to newer 3-pin oval (IR11) style.")

")
")